
Luxury ceiling photography offers a unique opportunity to showcase the intricate craftsmanship and architectural splendor that define high-end interiors.
Ceilings in luxury real estate are often designed to impress, featuring ornate details, grand heights, and artistic elements that contribute significantly to a property’s overall ambiance. Capturing these features in their full glory requires not only technical skill but also an appreciation for the artistry and design that make each space unique.
Photographing ceilings, however, presents a distinctive set of challenges like distortion. Unlike other interior elements, ceilings demand a careful balance of perspective and scale to effectively convey their visual impact. From complex patterns to subtle textures, every detail must be presented with clarity and precision. Without the right approach, the striking beauty of these architectural masterpieces can easily be diminished in photographs.
Moreover, achieving the right composition is essential to communicate the sense of space and sophistication these ceilings bring to a home. The interplay of lines, curves, and angles within a ceiling’s design requires thoughtful framing to ensure the structure’s elegance is captured without visual inconsistencies. This is especially critical in luxury real estate, where buyers expect a polished and accurate representation of every detail.
To meet these expectations, photographers must approach each project with an eye for innovation and precision. The tools you use, from camera equipment to post-processing software, are integral to achieving the desired result. However, it is equally important to consider the broader narrative your photographs will convey. By highlighting the artistry and grandeur of these spaces, you can craft a visual story that captivates and resonates with prospective buyers.
Understanding Distortion in Photography

Distortion in photography alters the way architectural elements are perceived, creating visual inconsistencies that can detract from the elegance of luxury spaces. In ceiling photography, even minor distortions can disrupt the intricate symmetry and precision of high-end designs, resulting in images that fail to convey the true sophistication of the property.
A common cause of distortion is the use of wide-angle lenses, which, while excellent for capturing expansive interiors, can sometimes introduce curvature in straight lines or exaggerate proportions. Additionally, the angle at which a camera is positioned plays a significant role. Tilting the camera upward to capture a ceiling can skew the image, making certain areas appear stretched or compressed. This imbalance often undermines the natural flow and balance of the space, compromising the aesthetic value of the photograph.
Lighting can also interact with distortion in subtle but impactful ways. Uneven lighting or overly dramatic contrasts may exaggerate irregularities in the image, drawing unwanted attention to areas that appear unnatural. These issues are particularly prominent in spaces with elaborate or geometrically complex ceilings, where every detail contributes to the visual harmony.
Understanding these challenges is essential for addressing them effectively. By recognizing how lens choice, camera placement, and lighting interact within a luxury space, photographers can anticipate potential distortion and make informed adjustments before the shutter clicks.
Techniques to Minimize Distortion
When working to minimize distortion in ceiling photography, a strategic approach to equipment and technique is essential.
Start by selecting lenses that are well-suited for architectural photography. Tilt-shift lenses are particularly effective, as they allow you to make precise adjustments that correct perspective issues directly in-camera. This helps preserve the natural proportions of the space without relying heavily on post-processing.
Positioning your camera carefully is equally important. To maintain clean, straight lines and avoid skewed perspectives, the camera should be leveled and aligned parallel to the ceiling. Using a tripod with a built-in leveling feature can make this step much more manageable, ensuring that your setup remains consistent throughout the shoot. A properly leveled camera is crucial in maintaining symmetry, particularly in rooms with elaborate ceiling designs.
Distance also plays a critical role in reducing visual inconsistencies. Standing too close to the ceiling or the edges of the space can increase the risk of exaggerated proportions or curved lines. Instead, position yourself at an optimal distance that captures the entirety of the ceiling without distorting its shape. This might require experimenting with different vantage points to find the best angle for the shot.
While wide-angle lenses can be helpful for capturing large areas, they must be used with care. Keep the lens as centered as possible to avoid uneven curvature or exaggerated stretching in certain parts of the image. In cases where wide-angle lenses introduce unavoidable distortions, consider taking multiple shots and stitching them together using specialized software for a more accurate depiction of the ceiling’s grandeur.
Finally, avoid over-tilting the camera upward, as this can create unwanted distortion at the edges of your frame. If you need to include higher portions of the ceiling, adjust your composition subtly or rely on tilt-shift lens capabilities to maintain a balanced perspective. Paying close attention to these technical elements will significantly reduce the risk of visual inconsistencies, allowing the ceiling’s artistry to shine through with clarity and precision.
Lighting Considerations
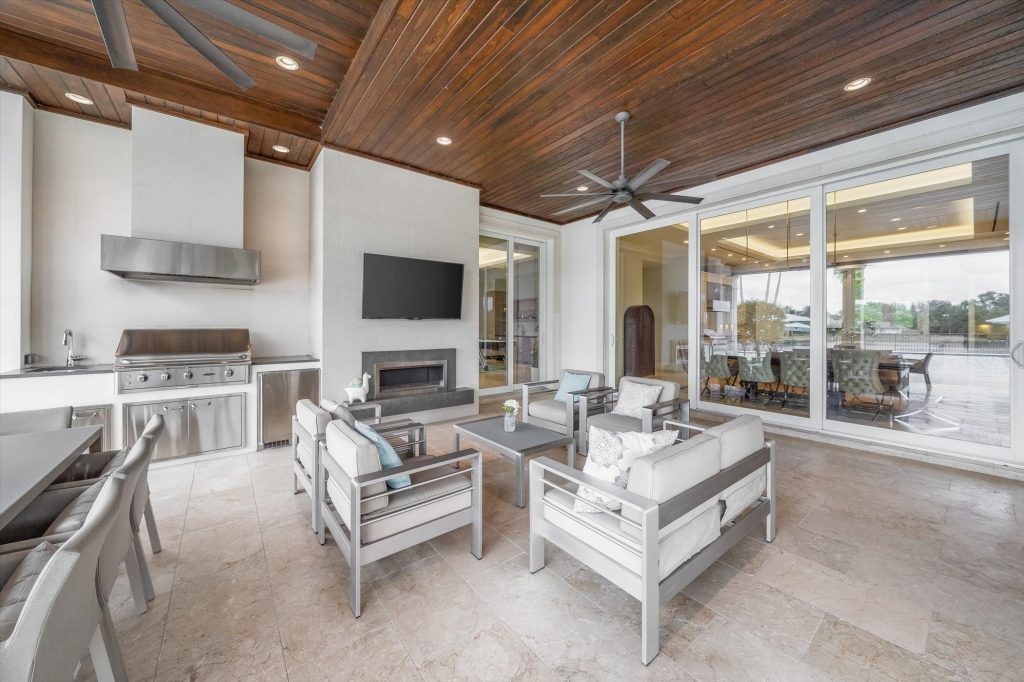
Lighting is a key element in creating visually striking ceiling photography, particularly in luxury interiors where every detail matters.
Proper lighting not only highlights the intricate craftsmanship but also ensures that the final image remains balanced and visually pleasing. A thoughtful approach to lighting allows you to capture the full elegance of a ceiling while minimizing any distractions caused by uneven illumination or unwanted shadows.
When photographing grand ceilings, begin by assessing the natural light available in the space. Large windows or skylights can provide soft, diffused light that enhances textures and architectural details without overwhelming the composition. However, relying solely on natural light may not be sufficient, especially in dimly lit interiors or during certain times of the day. In these cases, supplemental artificial lighting becomes crucial to achieve a well-lit and harmonious image.
Use a combination of soft, diffused light sources to fill in any areas that might otherwise appear underexposed. Softboxes and LED panels are excellent tools for creating even illumination that enhances the ceiling’s design without introducing harsh highlights or shadows. Carefully position your light sources to avoid reflections on glossy surfaces, such as polished wood or metallic finishes, which can detract from the overall aesthetic.
Lighting direction also plays a significant role in accentuating the three-dimensional qualities of ornate ceilings. By experimenting with the placement and angle of your lights, you can emphasize depth and detail in architectural features like moldings, medallions, or coffered panels. Subtle side lighting, for example, can help accentuate textures, adding visual interest without overpowering the scene.
For spaces with complex lighting setups, consider balancing multiple sources to maintain consistent exposure across the entire ceiling. Mixing warm and cool tones can create a sense of depth and contrast, but be mindful of keeping the overall color temperature cohesive to preserve the space’s refined atmosphere.
Additionally, integrating light strategically into your composition can subtly guide the viewer’s eye, drawing attention to the ceiling’s most impressive features. By striking the right balance between natural and artificial light, you can enhance the grandeur of luxury ceilings while maintaining a polished and professional result.
Post-Processing Tips for Distortion Correction
Refining your ceiling photography in post-processing is an essential step to achieving polished, professional results.
Even with careful planning and execution during the shoot, subtle imperfections may remain, particularly when dealing with complex architectural designs or challenging perspectives. Leveraging advanced editing software allows you to address these issues with precision and maintain the visual integrity of your images.
Start by utilizing lens correction tools available in programs like Adobe Lightroom or Photoshop. These tools are specifically designed to counteract the inherent curvature or stretching that certain lenses may introduce. By selecting the correct lens profile, you can automatically adjust distortions and align lines to appear straight and true to life.
Perspective correction is another critical step in post-processing. Many editing platforms offer features that enable you to straighten vertical and horizontal lines, ensuring that the proportions of the ceiling remain balanced. Manually adjusting the perspective can also help refine the alignment, particularly in images where the camera angle slightly skewed the composition.
Cropping and framing adjustments are useful for fine-tuning the overall balance of the image. By carefully aligning the edges of the ceiling within the frame, you can create a sense of harmony that enhances the architectural design. Be cautious to avoid over-cropping, as this may remove key elements that contribute to the image’s visual impact.
For lighting corrections, pay close attention to achieving even exposure across the entire frame. Tools like gradient filters and spot adjustments can be used to subtly brighten areas that may appear underexposed or to tone down highlights that might distract from the ceiling’s details. Consistency in light and shadow ensures the image retains a luxurious, natural appearance.
Finally, sharpening and noise reduction can enhance the overall clarity and texture of the photograph. When working with high-resolution images, these tools help bring out the fine details in ornamental features or intricate patterns without introducing unwanted artifacts. Apply these adjustments subtly to maintain a realistic yet striking visual effect.
Through careful post-processing, you can elevate your ceiling photography, allowing the craftsmanship and artistry of luxury interiors to be fully appreciated by viewers.
Showcasing Your Work

When presenting your ceiling photography, the goal is to highlight the sophistication and artistry of luxury interiors while ensuring the images are both visually compelling and true to the space’s design.
High-resolution images are essential, as they allow viewers to fully appreciate the intricate details, from ornate patterns to finely crafted architectural elements. Select shots that emphasize symmetry, balance, and the unique features of each ceiling, creating a gallery that speaks to the elegance of the properties you’ve captured.
Consider curating your work in a way that tells a story about each space. Pair wide-angle images that showcase the overall structure with close-up shots of the finer details to provide a comprehensive visual experience. This approach helps potential buyers or clients visualize the craftsmanship and grandeur of the property, fostering a deeper emotional connection to the space.
Choosing the right platform to display your work is equally important. Professional-grade websites or online portfolios with high-resolution support ensure your photographs are displayed at their best. Incorporating interactive features, such as zoom capabilities, allows viewers to explore the finer details of your images, adding an extra layer of engagement. Social media platforms that cater to visually driven content can also be a valuable tool for reaching a wider audience and showcasing your expertise.
Print presentations can offer an additional opportunity to elevate your work. High-quality printed materials, such as photo books or custom brochures, bring a tangible luxury to your photography, especially when working with clients or marketing high-end properties. Attention to detail in the printing process ensures that the precision and beauty of your images translate seamlessly from screen to print.
In addition, the way you frame and sequence your photographs can guide viewers’ attention and highlight key design elements. Thoughtfully grouping images by style, period, or architectural theme can help demonstrate your versatility as a photographer and your ability to adapt to various luxury spaces.
By carefully selecting how and where your work is displayed, you not only enhance its impact but also position yourself as a trusted expert in luxury real estate photography.
Tips from Professionals
Learning from experienced photographers in luxury real estate can provide valuable insight into perfecting your craft.
Professionals often emphasize the importance of adaptability, encouraging photographers to tailor their approach based on the unique features of each space. Understanding the distinct architectural elements of a property allows you to emphasize its strengths and create a more compelling visual narrative.
Investing in professional-grade equipment is a key recommendation among experts. A quality tilt-shift lens, for example, is often considered indispensable for architectural photography, as it provides precise control over perspective. Equally important is having a sturdy, adjustable tripod, which ensures stability and consistency across shots. These tools, when paired with expertise, make capturing refined and distortion-free images far more achievable.
Seasoned photographers also highlight the significance of preparation. Before stepping into a property, conduct thorough research on the space, such as reviewing floor plans or previous images, to understand its layout and defining features. Taking the time to analyze the natural lighting conditions at various times of day can also reveal the optimal windows for shooting. This proactive approach allows you to maximize the quality of your results and work efficiently during the session.
Attention to detail is another hallmark of professional real estate photography. Experts suggest regularly assessing the composition of your shots as you work. Look for elements within the frame that could distract or overpower the intended focus, such as misaligned furniture or overly bright highlights. Addressing these factors on-site reduces reliance on extensive editing later, saving both time and effort.
Finally, many professionals advocate for continuous education and refinement of your skills. Keeping up-to-date with the latest advancements in camera technology and post-processing software ensures your work remains competitive and polished. Engaging with photography communities, attending workshops, or seeking mentorship from industry leaders can offer fresh perspectives and strategies for overcoming challenges in luxury real estate photography.
By combining technical proficiency with a commitment to growth, you can align your work with the highest standards in the industry.
Conclusion

Mastering the art of ceiling photography in luxury real estate requires a thoughtful blend of technical expertise and creative vision.
By prioritizing accurate representation and eliminating visual inconsistencies, photographers can emphasize the grandeur and artistry inherent in high-end interiors. Every step, from selecting the right equipment to refining images during post-processing, plays a pivotal role in achieving a polished result that speaks to the sophistication of these spaces.
Equally important is an understanding of how each element—be it lighting, composition, or perspective—contributes to the overall narrative of a photograph. Luxury buyers expect images that not only highlight a property’s design but also evoke a sense of awe and admiration. By implementing the techniques outlined throughout this guide, you can ensure your work not only meets but exceeds those expectations.
Ultimately, ceiling photography is more than capturing an image—it’s about preserving the essence of a property’s design. Through careful planning and execution, you can transform intricate architectural details into compelling visual stories, showcasing the unparalleled elegance of luxury interiors.
Looking to elevate your property’s listing? Reach out to us today to learn about our exclusive media and marketing services!
Discover a curated collection of hyperlocal premium real estate videos and images available exclusively through our dedicated stock photo library.


